



|
Showing posts with label Tips and Tricks. Show all posts
Showing posts with label Tips and Tricks. Show all posts
Monday, July 20, 2009

Monday, July 13, 2009
Hooters Isn't Bad - Make Your Parents Proud [VIDEO]

This is amazing. Her parents must be so proud of her.
The Hooter's girl barstool beer trick.
Read more...
Wednesday, June 17, 2009
Best Blogger Hacks for Better Functionality [HOW TO]

Thanks to Tech Kumar for this information. The below let you implement Wordpress blog plugins into your Blogger blog.
Related posts with thumbnail:
This widget shows related posts with thumbnail images works with Blogger, WordPress, and TypePad. Don’t want to display image thumbnails then try this related post hack.
Display short summary with image thumbnails in Home page:
The good thing about this hack is it automatically recognizes the image in your post and displays it, but the downside is you must place only one image per post. Another similar thumbnail widget, displays only images not the text.
Show popular posts based on number of comments:
Popular Posts widget checks for Comment feeds to find out the most commented posts using content aggregation tool from Yahoo.
WordPress like Greet Box for Blogger:
Kaushik created this hack for Blogger blogs, looks similar to WordPress Greet Box but limited to only small number of referrers(Google search, Yahoo search, Digg, StumbleUpon). Visit this page for demo, you will find Blogger Greet Box at the top.
Top Commentator widget for Blogger:
This widget works exactly as the WordPress plugin, it displays the top commenter’s names along with their site url, makes use of Yahoo pipes.
Smilies for Blogger blogs:
Display your mood in blog posts, or let your readers do that in their comments on your blog.
Automate short summary – Read More link:
Stop adding codes inside your posts to display read more link and start installing automating scripts to do it automatically whenever you publish new posts. There are two hacks for displaying auto-read more link for your posts on Home page CSS hack and Java script hack. Try other similar hacks with different approach expand and collapse(super peek-a-boo hack), and improved super peek-a-boo.
Breadcrumb for Blogger blogs:
Displays breadcrumbs at the top of your post titles, makes navigating easy for site visitors.
Display Gravatar like comment author photos:
This hack display Blogger profile images of the users who commented, like the Gravatar that works with WordPress.
Display random posts:
We already know how to display related posts, this hack displays random posts. For WordPress blogs there is a nice plugin(WordPress Related posts) which displays random posts when there are no related posts.
Let readers dynamically switch themes on your blog:
This is entire different hack for Blogger blogs which lets visitors to switch between themes for the blog.
Add category or label feeds to your blog:
You can see this kind of category feeds on News or Magazine websites where they display separate category feeds for each category posts.
Table of Contents for blog posts:
This is highly interactive hack for displaying Table of contents, it can sort posts based on post title, sort by date: newest first, or oldest first, sort in reverse order.
Thanks to Tech Kumar for this information.
Read more...
Thursday, June 11, 2009
Add Calendar to Desktop Wallpaper [HOW-TO]

This isn't a widget and added program you need to install; that's what I like about it. The monthly calendar is actually part of the desktop wallpaper. Big Huge Labs will let you upload whatever desktop wallpaper you like, and it will add the transparent calendar to your wallpaper. Only bad side; you will have to re-upload and update your wallpaper once a month.
Add Calendar to Wallpaper [link]
Wallpaper: Turn any photo into cool desktop wallpaper with a calendar
Convert any photo into a perfectly-sized desktop wallpaper for your computer or portable device that even includes a handy monthly calendar. Add special effects to desaturate, blur, or color your wallpaper. Standard and wide-screen monitors, iPhones, cell phones, and other portable devices are supported.
Read more...
Thursday, May 28, 2009
Add Authentication to Squid Proxy [HOW-TO]

Squid is a caching proxy for the Web supporting HTTP, HTTPS, FTP, and more. It has a wide variety of uses, from speeding up a web server by caching repeated requests, to caching web, DNS and other computer network lookups for a group of people sharing network resources, to aiding security by filtering traffic.
The below steps will add authentication to your squid proxy. Why would you want to add security? Why not, I don't know. Just do it.
Tested and verified on Ubuntu Hardy Heron Server 8.04
1: Create a username/password
First create a NCSA password file using htpasswd command. The word 'user1' below should be changed to whatever the heck you want. Also, the '-c' tag will create this file. You don't need to add this tag if the file is already in play.
# htpasswd -c /etc/squid/passwd user1
Modify permissions to the new file so squid can read it:
# chmod o+r /etc/squid/passwd
2: Locate nsca_auth authentication helper
Usually nsca_auth is located at /usr/lib/squid/ncsa_auth; at least, it was for me. You can use the dpkg command to try and locate it if it seems to be in a different location.
# dpkg -L squid | grep ncsa_auth
3: Configure nsca_auth for squid proxy authentication
Open /etc/squid/squid.conf file and add the following parameters. These are all found towards the top of the configuration file (there's a lot of stuff in the conf file). It is worth noting that your basic program location may differ depending on where your ncsa_auth helper is located. The basic realm can be changed to whatever you want; it dosen't matter.
auth_param basic program /usr/lib/squid/ncsa_auth /etc/squid/passwd
auth_param basic children 5
auth_param basic realm Squid proxy-caching web server
auth_param basic credentialsttl 2 hours
auth_param basic casesensitive off
acl ncsa_users proxy_auth REQUIRED
http_access allow ncsa_users
Last Step: Save and close the file.
Restart squid and you should be all set!
Now that wasn't too bad was it?
Read more...
Friday, May 8, 2009
Best Beer Pong Trick Shots
Cool Beer Pong Trick Shots - Watch more Funny Videos
I am pretty good at beer pong, but not this good. Insane skills.
Useless information that shouldn't be taken seriously: This game may have several health issues associated with it. Besides the alcohol consumption which occurs during a game, there is the possibility of germs spread from the table and floor through the "cleaning" water, as well as the transmission of diseases spread through the sharing and reuse of cups. After a false press release in 2008 alleging the Center for Disease Control found a link between an explosive spread of herpes among 17-21 year olds and drinking from shared beer pong cups, many players of the game responded by replacing the beer in cups with water, instead drinking from a cup of their own whenever a shot was successfully made.
Play smart!
Read more...
Thursday, April 2, 2009
How To Booby Trap a Bathroom

Show Me How! is the place where I found this how to. So here's the plug for Show Me How:
Want to know how to dice a mango? Show Me How is packed with illustrated step-by-step tutorials. A nearly wordless reference book that teaches you life's most essential skills.
Link: Showmenow.com

Booby trap a bathroom:
1) Fill the showerhead with colored candy
2) Fill the soap dispenser with jam.
3) Block part of the tap with tape.
4) Tape a plastic snake under the toilet seat.
5) Tuck a toy spider in the spigot.
Link: Showmenow.com
Read more...
Monday, March 16, 2009
20 Things You Didn't Know About.. Time
Discover Magazine has an excellent article on 20 things you didn't know about time. They have other categorys.
Here are some of them: Full list here
-Green days. The Department of Energy estimates that electricity demand drops by 0.5 percent during Daylight Saving Time, saving the equivalent of nearly 3 million barrels of oil.
-One second used to be defined as 1/86,400 the length of a day. However, Earth’s rotation isn’t perfectly reliable. Tidal friction from the sun and moon slows our planet and increases the length of a day by 3 milliseconds per century.
-This means that in the time of the dinosaurs, the day was just 23 hours long.
-According to quantum theory, the shortest moment of time that can exist is known as Planck time, or 0.0000000000000000000000000000000000000000001 second.
Full list here
Other cool ones:
20 things you didn't know....
Read more...
Friday, January 30, 2009
Stopwatch Measures a Page's Load Time
Stopwatch is a site which lets you measure how long it takes to for a page to load. All you have to do is enter the URL to be measured and watch the top of the window.
Stopwatch
From their web site:
How does it work?
The stopwatch is a small Javascript that runs on your computer (not the Numion server). It measures the time between the moment your browser starts to load the URL and when the browser signals that it has finished ("Done" in the status bar). The measurement therefore includes fetching and interpreting all HTML (including frames), images, and Javascripts. It does not include content that is handled by plugins. If the page is in the cache then the stopwatch will measure the faster loading time (see tip above). The accuracy is the accuracy of the Javascript timer, on most systems 10 milliseconds.
Stopwatch
Read more...
Thursday, January 29, 2009
How to Get New XP Themes
 |  |  |
To change your XP theme, you’ll first need to install either StyleXP ($19.95 ) or UXTheme Multi-Patcher (free). These programs enable Windows XP to use themes other than those made by Microsoft. Microsoft only has a handfull of themes available, so yeah, go ahead and install UXTheme Multi-Patcher; it's safe and can be uninstalled if need be.
UXTheme Multi-Patcher is a small download which simply allows you to install downloaded XP themes. This patch is for Windows XP and Windows Server 2003 only. Below is a link to custimize.org, which has a great tutorial on installing the patcher:
http://customize.org/xpthemes/help/How_To_Install_UX_Theme_Multi_Patcher
1) Install UXTheme Multi-Patcher
2) Download an XP theme to a folder of your choice. Unzip it if needed.
3) Select the .msstyles file. This will bring up the windows Display Properties dialog. From here you can click
I good site to check for cool XP themes:
http://www.instantfundas.com/2008/07/20-most-beautiful-themes-for-windows-xp.html
Read more...
Friday, December 12, 2008
Treatment for the Extreme Gamer is Here

Is your life as you know it turning into a large Call of Duty mission? Do you live online? If you answered yes to any of these questions, then you have to try this new treatment. It's called 'poke yo ass stop playing' treatment.
Just don't become an anti-gamer: Somebody who still refuses to accept that video games have become a major and defining element of our culture. The belief that only lonely, agoraphobic and pencil-necked geeks play computer games is an archaic stereotype, and Anti-gamers primarily believe only geeks and nerds spend their time playing video games. In reality, this is pretty much the same as saying "only sluts ever have sex". Today, everybody plays video and computer games; anti-gamers tend to show soccer-mum qualities and *really* need to wake up and get with the times.
Read more...
Tuesday, October 28, 2008
How To Control the Bird Population

Get one of these spiders, called the Golden Orb Weaver. Joel Shakespeare, head spider keeper at the Australian Reptile Park, said this is a well known but rare occassion. Someone just happened to catch it on camera. Nonetheless, get one of these, and you may notice a change in the number of birds that fly through your yard.
The startling images were reportedly taken in Atheron, close to Queensland's tropical north.
"Normally they prey on large insects… it's unusual to see one eating a bird."
Mr Shakepeare said he had seen Golden Orb Weaver spiders as big as a human hand but the northern species in tropical areas were known to grow larger.
Queensland Museum identified the bird as a native finch called the Chestnut-breasted Mannikin.
Via
Read more...
Wednesday, October 1, 2008
Play Burned Wii Games Without Voiding Warranty

Well, actually, Im not sure if it really doesn't void the warranty; but I thought this was rather interesting. The guide below is all software-based. There is no need to crack open your Wii. Everything you need to install has an uninstaller. It is worth noting that even though you may later uninstall everything, there will still be logs hidden deep inside the Wii that have evidence of your efforts. But who cares?
IMPORTANT NOTICE: This is for informational purposes only. Try at your own risk. cough -- cough
Awhile ago, Digg posted this:
A video has come to our attention which shows the running of a supposed Wii backup via the use of a bootloader that is stored on the memory card.
I investigated this further and found a procedure that allows Wii backup play without the use of a memory card. Mind you, a memory card must be used for the initial installation. But afterwards, your memory card free. So, on to the guide:
Part One: Preparing the Loader
1. Configure your SD card for homebrew. Learn about some of the basic concepts and most used programs in using homebrew, such as the Twilight Hack and the Homebrew Channel. Learn more here. If that link is no longer available, just Google it.
2. Once you have found a way and downloaded the Wii_Loader package, rename the dvd-backup.dol file to boot.dol, and create a folder titled "Loader". Place the .dol in the folder. Find some graphic/xml files to fill in for now, or make your own.
** This way, however, causes black and white playback when using regular RCA cables. To avoid this, use the updated backup launcher by Wiigator. It can be installed using the WAD manager. You'll learn about the WAD Manager later. **
3. Place the CIOS36_rev5-64-v1042.wad file in the wad directory of your SD card.
4. Place the backup loader files (boot.dol, icon.png, meta.xml) in the Loader folder, and put the Loader folder in the apps folder on your SD Card.
5. Place the DVDX installer in a folder titled "DVDX" (without quotes) and put that in the apps folder on your SD card.
6. Place the WAD manager folder in your apps folder on your SD card.
7. Boot the Homebrew channel.
Part Two: Wii Setup. Only do these steps ONCE.
1. Install cIOS via the WAD Manager.
2. Install DVDX. If you have the option to Uninstall on the menu, DO THAT FIRST. Navigate in the menu to "ADVANCED". Press LEFT or RIGHT on the Wii remote until you get to IOS249. Install it.
Now you are ready to get some games and play them on your Wii.
Part Three: Getting and Playing games on Your Wii
1. Find an ISO and download it
2. Decrypt the game ISO: put the ISO in the same directory of the backup-creator with the common-key file, RIGHT CLICK the ISO, and select OPEN WITH. Find the backup creator and select it.
3. Wait for this process to be done, and then burn the newly created file to a DVD (recommendation: DVD-R). Use whatever burning software you want, whether it be Nero or IMGBurn. Note that you must use a DVD-R for this to work. It has been tested and failed using a DVD+R. A note within a note would be worth making that you could technically change the book-type of the DVD+R using IMGBurn, but not all brands of DVD-burners are supported. This would cause even further hacking and is not feasible.
4. Put your disc in the Wii. Boot up your Wii and load the Backup Loader from the Homebrew Channel.
** If using the updated launcher from Wiigator, you simply need to start the newly installed Backup Launcher Channel!!! By now, you can remove your SD card. **
Good Luck. So, how'd it work for you?
Read more...
Monday, September 8, 2008
Perfect Ubuntu Server Setup

So I followed the guide to setup the perfect Ubuntu Server 8.04. It worked great and was easy to follow, but there are a few things that might be of help.
Background on the tutorial: Shows how to set up an Ubuntu Hardy Heron (Ubuntu 8.04 LTS) based server that offers all services needed by ISPs and hosters: Apache web server (SSL-capable), Postfix mail server with SMTP-AUTH and TLS, BIND DNS server, Proftpd FTP server, MySQL server, Courier POP3/IMAP, Quota, Firewall, etc. This tutorial is written for the 32-bit version of Ubuntu 8.04 LTS, but should apply to the 64-bit version with very little modifications as well.
Tutorial Guide: Click here to begin tutorial
Notes:
After you finish the guide, it's time to install ISPConfig. The ISPConfig guide can be found here. Being new to Ubuntu, one thing that would've been helpful was the command for downloading the ISPConfig package to your server. Well, here's the command:
wget http://prdownloads.sourceforge.net/ispconfig/ISPConfig-2.2.25.tar.gz?download
Add some more notes in the comments if you have anything helpful....
Read more...
Thursday, September 4, 2008
Google Chrome on Ubuntu

So Google released the beta version of a new open source browser: Google Chrome. But it's only available for Windows at the moment. So here's a guide to install Google Chrome on Ubuntu using Wine. Thanks to myscienceisbetter.com for the tutorial.
Full guide here
1. Install wine (follow the official instructions http://www.winehq.org/site/download-deb)
2. make sure wine 1.1.3 is installed by entering the following in the terminal
wine --version
3. Download the Chrome installer
wget http://gpdl.google.com/chrome/install/149.27/chrome_installer.exe
4. Install Chrome
wine chrome_installer.exe
5. Open the Google Chrome.desktop icon, which was created on your Desktop, with any editor you like. Make sure you add "--new-http --in-process-plugins", without the quotes at the end of this line:
Exec=env WINEPREFIX="/home/yourusername/.wine" wine "C:\\windows\\profiles\\yourusername\\Local Settings\\Application Data\\Google\\Chrome\\Application\\chrome.exe"
to make it look like this:
Exec=env WINEPREFIX="/home/yourusername/.wine" wine "C:\\windows\\profiles\\yourusername\\Local Settings\\Application Data\\Google\\Chrome\\Application\\chrome.exe" --new-http --in-process-plugins
6. Save the file!
7. Go to your desktop and start Google Chrome
Full guide here
Read more...
Friday, August 22, 2008
Ubuntu: Increase Resolution on C400

Background: Installing Ubuntu 8.04 (Hardy) on a Dell Latitude C400. The built-in video card uses an Intel 830M chipset.
When I installed the Hardy Heron, it set my display resolution to 800x600 and refused to give me an option to make it better.
Resolution: The problem was solved by editing the xorg.conf file. Below are the details.
The xorg.conf is located in /etc/X11
i.e /etc/X11/xorg.conf
Wise man say: Backup the xorg.conf file before editing. Why? If you screw up your OS, the commonest one might be a gdm error or something when you restart, you will be able to simply go to the character based shell(no GUI X Server) and put your backup xorg.conf file back into play.
Code:
sudo cp /etc/X11/xorg.conf /etc/X11/xorg.conf-backup
sudo gedit /etc/X11/xorg.conf
Once inside the config file, I removed the "vesa" option under the 'Device' section. After saving the config file and re-booting, BAM! I was presented with a screen resolution of 1024x768.
Note: In addition to the above, user Charlotte Gonella had to turn off video scaling in BIOS.
Read more...
Friday, August 15, 2008
Toaster Inside Your Computer....Finally!

Say hello to the CrazyPC 5.25 Inch Bay Toaster
Comes with Windows software for adjusting heat and time (Mac OS version coming soon!)
via Crazypc
Features
-Fits in a standard 5.25 drive bay
-Toasts bread in just minutes (bread sold separately)
-Requires available USB port and 4 pin Molex power connector
-Attractive aluminum finish face plate
-Windows based software interface controls variables for time duration and heat intensity (Mac OS version coming soon!)
-Includes crumb tray for easy clean-up!
-Easy to Install
-Warranty 2 years
-Air ducting ventilation exhausts hot air out of the back of case. Requires a free PCI slot.
Crazypc
Read more...
Friday, August 8, 2008
How To: Upgrade PS3 Hard Drive

Tested and approved:
The first step to replacing the hard disk is going to the store or visiting an online retailer to pick up a new hard disk. The PS3 is compatible with just about any 2.5-inch SATA notebook hard disk. Both 5400- and 7200-RPM drives should work fine. The physical size of the hard disk is important because it has to fit the PS3's 2.5-inch drive tray.
Once you have your upgrade drive, the next step is to back up the data on your current PS3 hard drive to an external storage unit. You can skip this step if you aren't attached to your music, videos, and game saves, but most of us will probably want to save all that information. The PS3 has a built-in software backup utility that can copy the PS3's hard-drive contents to an external storage device, such as a USB thumb drive or a memory stick. The removable storage device must use the FAT32 file system in order for the PS3 to recognize it. If you have an external hard drive that's formatted in NTFS, you can use the Disk Management utility in Windows to reformat the drive, but you'll need to create partitions on large external hard drives because Windows can only do FAT32 on drives 32GB or smaller.
You will need a Phillips-head screwdriver to complete this part of the installation process. The PS3 owner's manual also includes step-by-step details on how to replace the hard drive, in case you need more instructions.
Click here for Game Spot's instructions for swapping out your hard drive.
The last step is to format the new hard drive. If you're lucky, you can turn on the console and let the system format the new drive. In my case, it wasn't that easy (it was still pretty easy though). If you can't simply power on and format the hard drive, you'll probably need to download the system update data from Playstation, put it on a USB stick, insert the USB stick into the PS3, and upload the data onto the newly installed hard drive.
Then load up the PS3 backup utility to restore data from your external storage device back onto the PS3 hard drive.
Read more...
Friday, July 18, 2008
Part 2: Acer Mini-Tower Issue of Over-Heating
In part one of my Acer mini-tower issue of over-heating, I introduced Speed Fan; It basically taps into sensors on the motherboard to give a reading of your device's fan speeds and temperatures. In my instance, I figured that messing with the fan speeds was too much hassle. Speed Fan was, however, a great tool for seeing what kind of temps you're actually getting though.
After installing Speed Fan and monitoring the temps, the L100 would still shut off unexpectedly; and everytime it would shut off, I would be doing something else and not even be able to see if the temp maxed out.
Anyway, I ended up just re-applying thermal grease to the CPU; and the computer hasn't shut off yet. I'm thinking about transferring the setup to a new case (so I can add additional fans) and use it as a front-end interface for mythTV. I bought an Acer Aspire X1200. You can't beat the price tag: $450. So, there you have it. Throw some grease on that CPU and keep going. That or throw it in a new case that has a better cooling system.
Speaking of a cool PC, check out this guy who made a PC freezer:
Octools: PC Freezer
Read more...
Monday, July 7, 2008
Unlimited Scrolling Desktop: Wow!
Freeware for Windows only: 360desktop
It turns your Windows desktop into a 360-degree virtual desktop.
Get almost unlimited desktop space; make desktop widgets from your favorite pieces of the web, plus create & share 360° interactive wallpaper. See something that you like online? You can now clip it and put it right on the desktop: any part of any webpage or grab your favorite web widgets, RSS feeds, games, videos - whatever you like - it's totally up to you!
And what's coming next ...
Create your own interactive 360's. Think of the desktop as an "interactive canvas". Create simple 360's from your favorite images, photos, or online albums such as Flickr, or transform the desktop into a multimedia mash-up, with web content integrated into the photo background.
Sounds pretty cool. Check it out. What do you think?
360desktop
Read more...
Subscribe to:
Posts (Atom)
 The Best Online Webcams to Watch
 Cinnamon and Honey Cure All
 Marilyn Manson + No Makeup = Weird Manson
 Looney Tunes Kill Their Rivals Finally
 How to Add Authentication to Squid Proxy
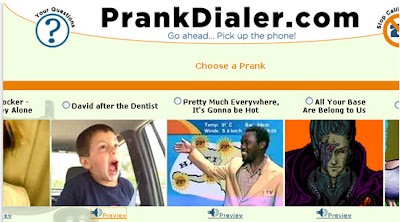 Top Two Free Prank Call Sites
 If Men Make Women's T-Shirts
 Play Burned Wii Games Without Voiding Warranty
 How the 90s are Making a Comeback
 Best Google Streetview Maps
 How To: Upgrade PS3 Hard Drive
 Cool / Interesting Google Maps Locations
 Erase Only One Color in MS paint
 Get Your OWN Google Search Engine
 Pictures that Look Photoshopped
 If Women Controlled the World. . .
  World's Largest Implants: 34FFF
 Stewie Griffin Un-tooned
 Reason Behind America's Obesity





